
Google OAuth2 using the new Google Identity Services SDK for React using Jwt-decode


In this tutorial, we will be learning how to make sign-ups stress free and hassle-free by implementing authentication via Google OAuth2 using the new Google Identity Services SDK for React @react-oauth/google🚀.
You’ll need
To create-react-app React application that makes requests of your API
Installation of jwt-decode
Basic knowledge of React
Node.js installed
Code editor ( Visual Studio Code preferably )
Setting up Your Google Cloud project
To integrate Google Login into our React app, you need a Google Client ID. First, you’ll need to create a Google Cloud project.
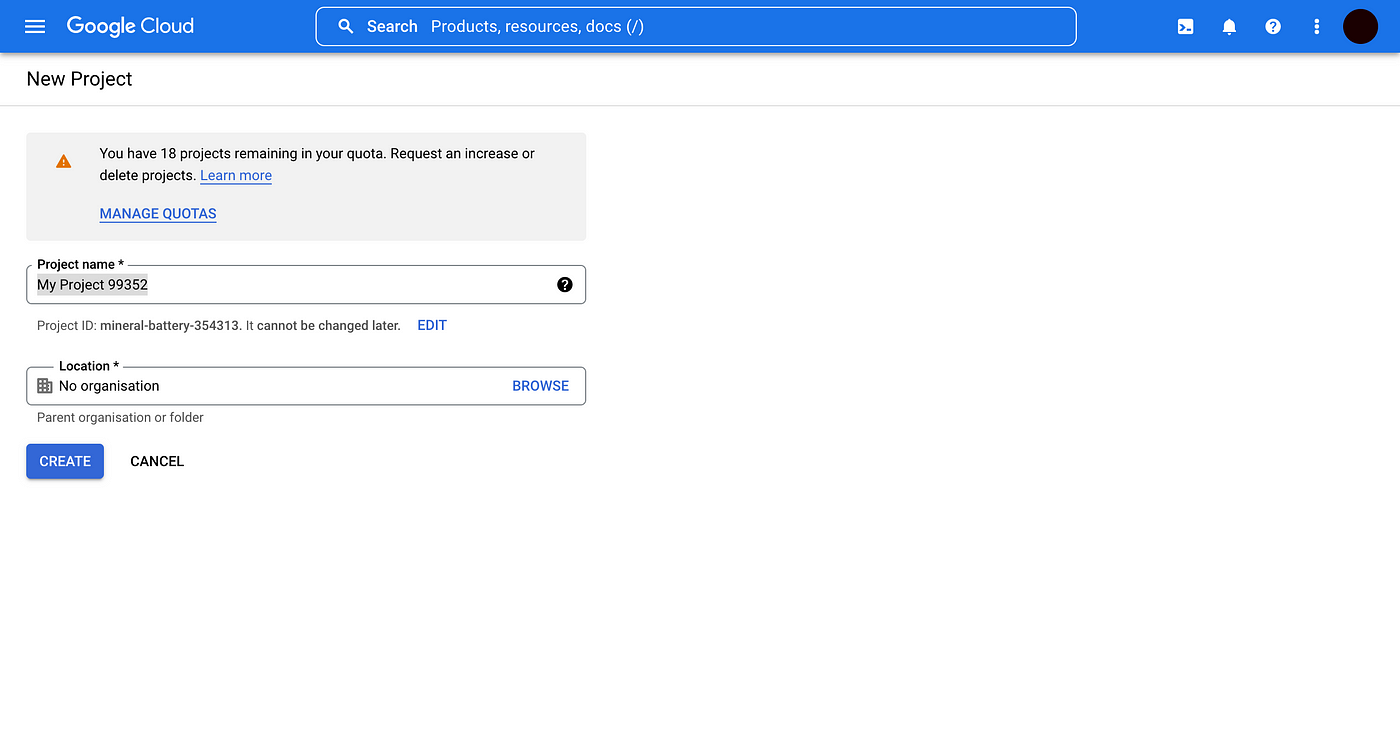
Create a project and choose a name for your project.
2. Once you have a project in place, proceed to Credentials — Create credentials — OAuth client ID.

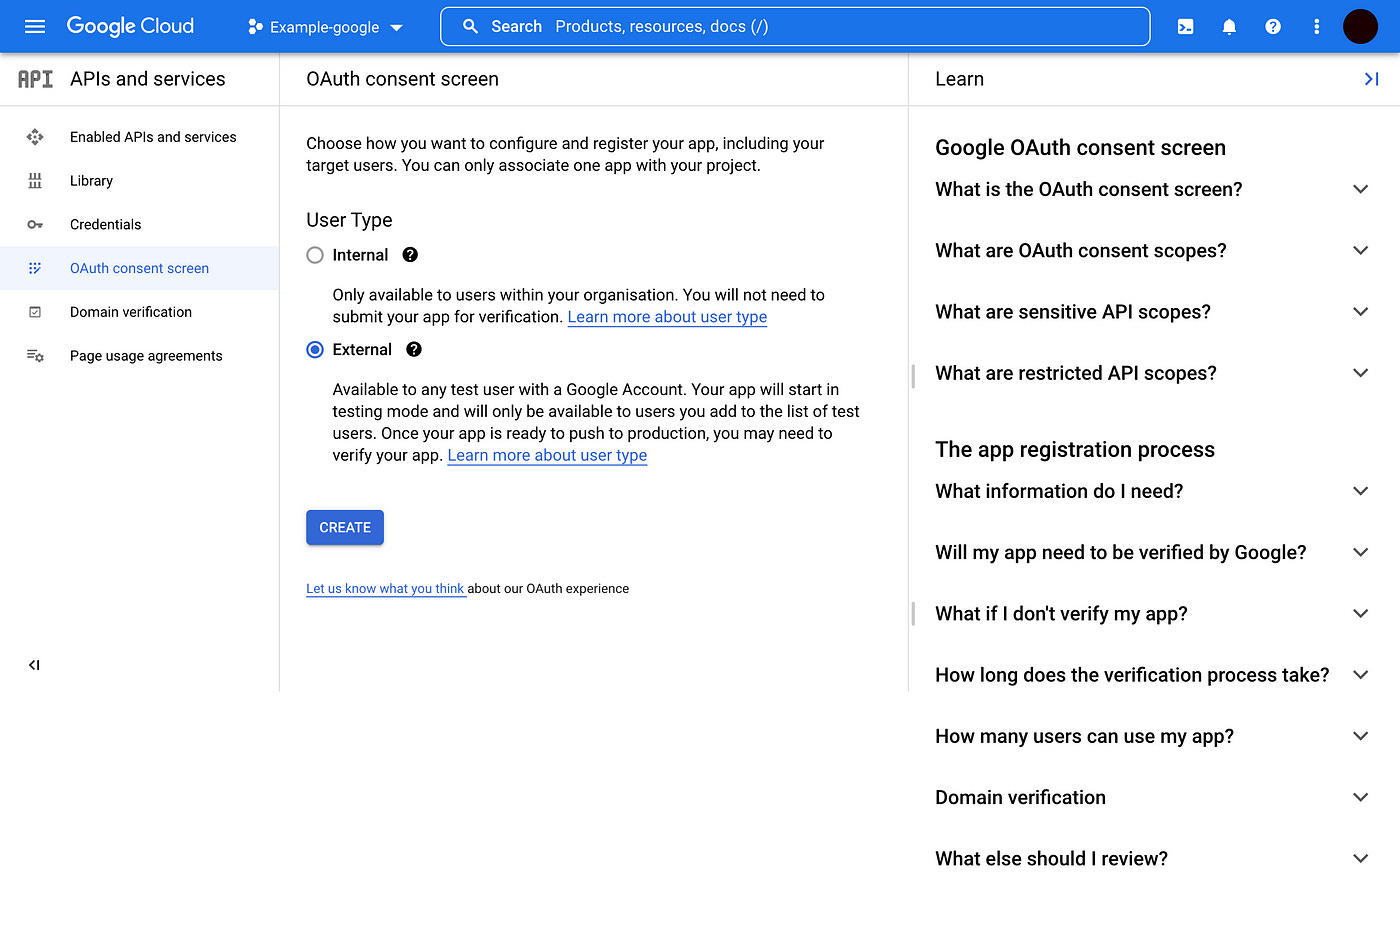
3. You’ll need to configure your OAuth consent screen. Choose external since we want to give access to everyone with a Google account. Google will then ask for the app’s name and some developer contact details.
4. Fill up the app registration form. For the most part, you can leave it blank.
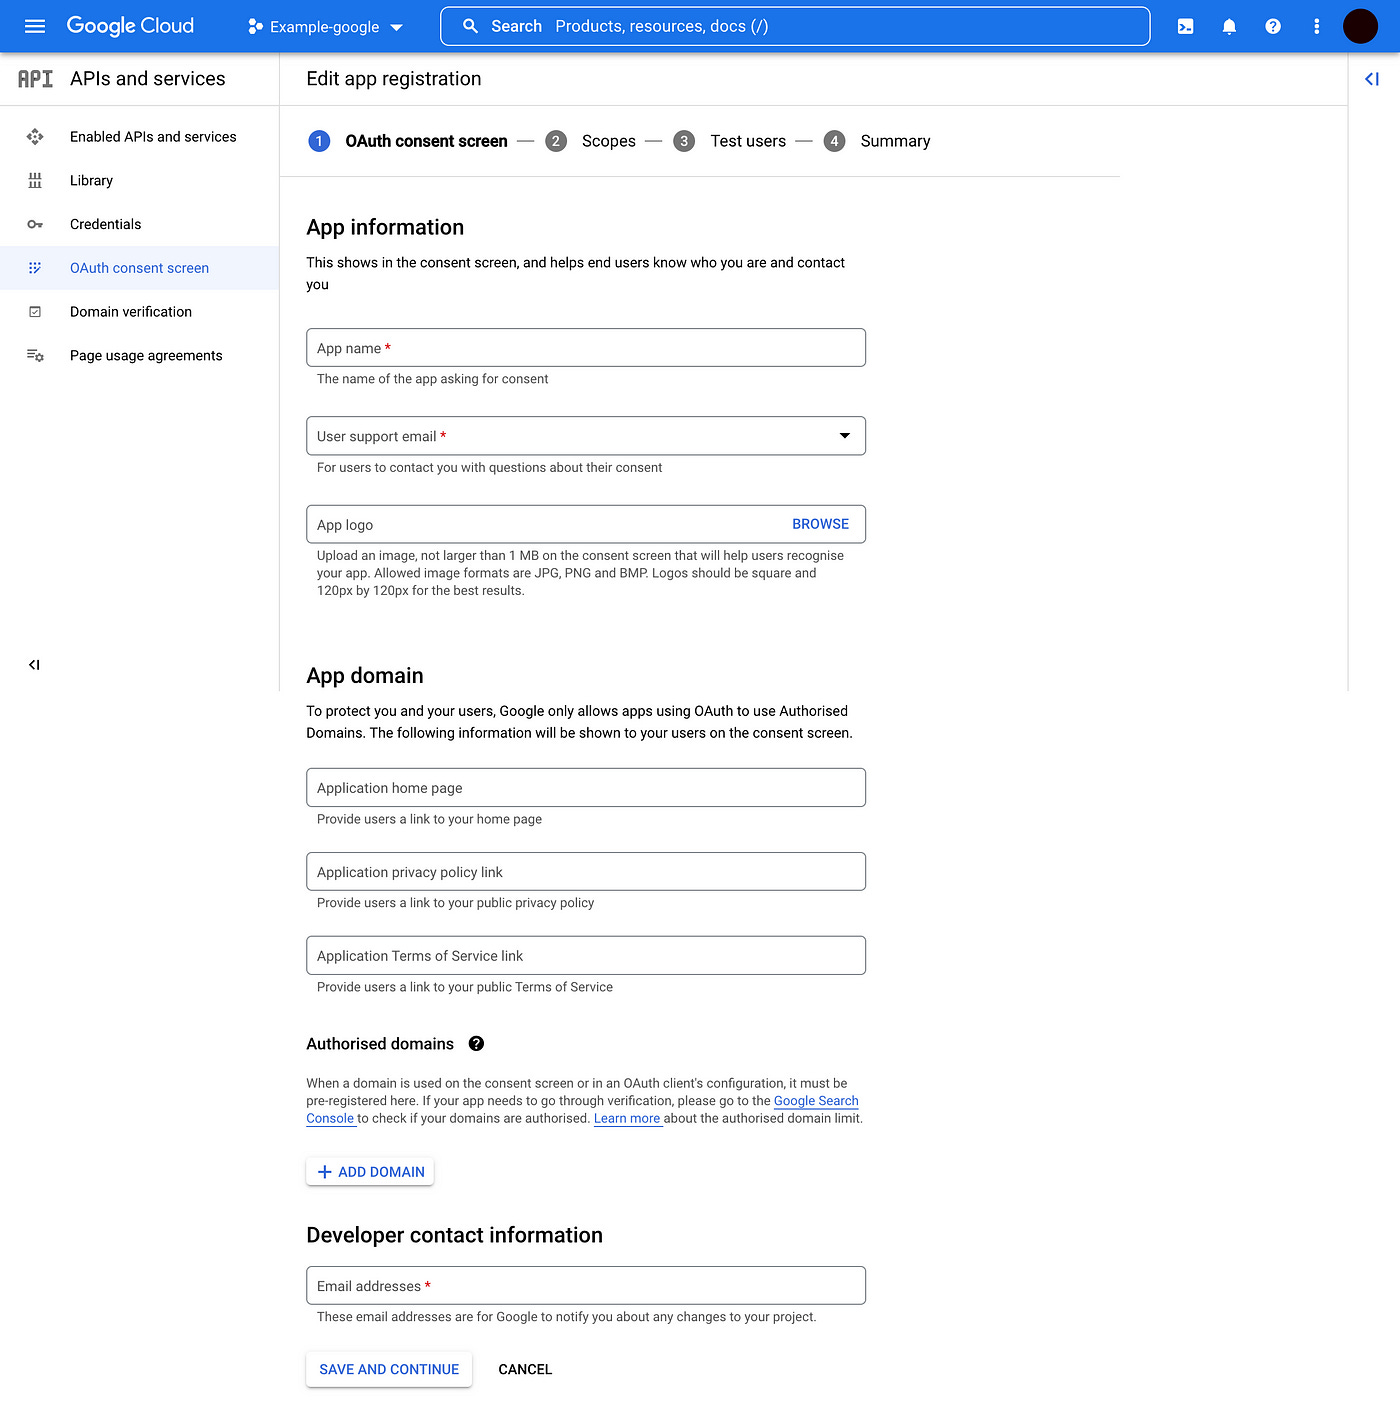
Choose the scope best suited for the app that you shall develop and fill all other necessary inputs according your application requirement.
We head back to Credentials — Create credentials — OAuth client ID. Choose the Web application type and we can provide all Authorised origins and redirect URL’ s.
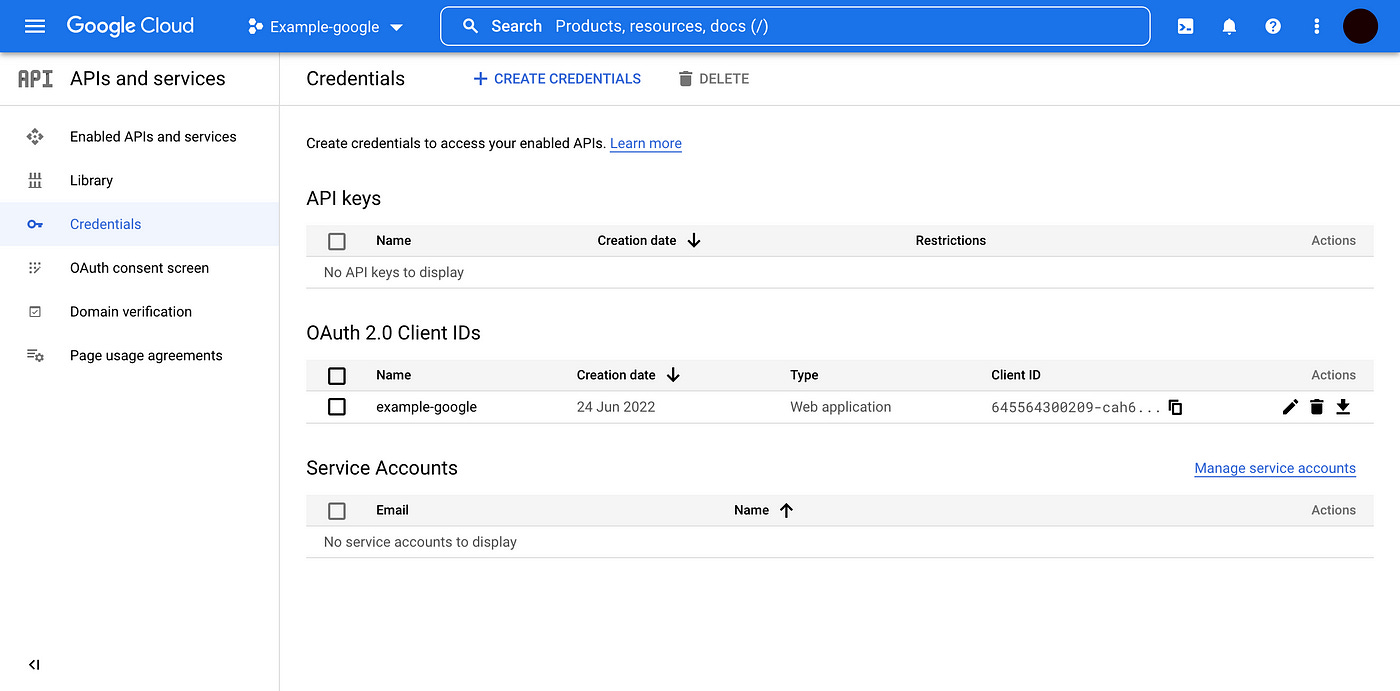
We will see our Google client ID and a client secret. We’ll only need the client ID.
Let’s create our React App and Login Component
Once you have your Google Client ID, we start creating our React application to integrate Google Login.
We will start with create-react-app application, and add all necessary dependencies which are Google OAuth2 using the new Google Identity Services SDK for React @react-oauth/google🚀 and jwt-decode is a small browser library that helps decoding JWTs token which are Base64Url encoded.
Let’s get started by running the following commands but make sure you have the necessary requirements for authenticating Google Login in React
Node.js installed
Code editor ( Visual Studio Code preferably )
Google Client ID
Basic knowledge of React
Create a file named src/lib/GoogleLoginPage.js, with the following content:
You can run npm start and check your console to receive your encoded token which we will decode using jwt-decode.
Decoding Google Token using JWT-DECODE
Now that we have gotten our google response token, lets decode to get all necessary user info.
Still in the GoogleLoginPage.js let’s update it
Let’s do a break down of what we just did.
After getting our Google Login response in our responseGoogle() , we created a variable to store the decoded token by importing jwt-decode package and calling the response we got from our google login.
Now that the token has been decoded, we can now get our user info, store it into our localStorage, de-structure the necessary needed info and send it to the database.
Reconfigure Google OAuth
Lastly don’t forget to configure all necessary Authorised JavaScript origins and Authorised redirect URIs in your Google API.
Hurray!!! we can now view, enjoy and test our finished application
You can check out the live demo here:
https://socials-website.netlify.app/
You can view and download our source code at: https://github.com/OloriAsabi/socials
Conclusion
In this tutorial, we have learnt how to Authenticate User with the Google OAuth2 using the new Google Identity Services SDK for React @react-oauth/google🚀 and decoding token with JWT-DECODE.
I really hope you learnt something new today, don’t forget to like, share and comment.
References
Google OAuth2 using the new Google Identity Services SDK for React @react-oauth/google🚀